
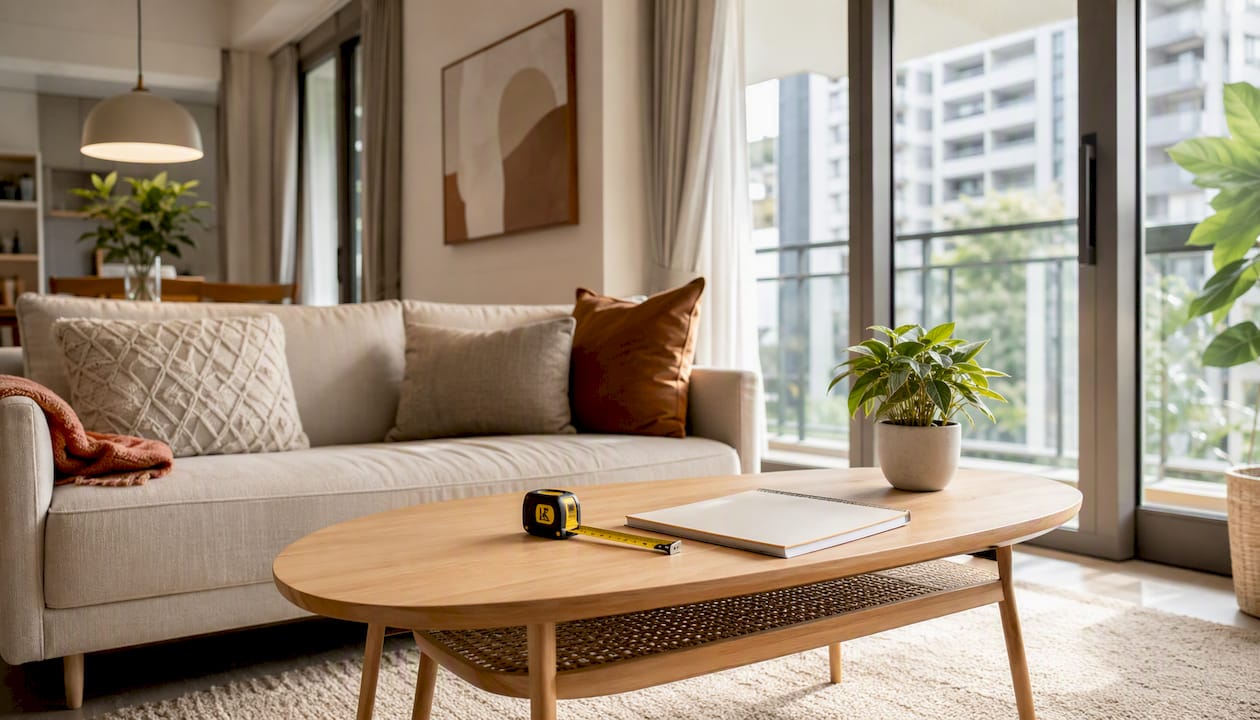
A staging consultation succeeds when the meeting produces three things: a prioritised, sellable scope of work, a clear price range, and a scheduled next step. Everything else—the small talk, the walkthrough, the report, exists to support those three outcomes. If you leave a client’s home without them, the consultation was pleasant but unproductive.
This staging consultation client meeting guide breaks the process into three phases that most staging professionals will recognise: preparation before you arrive, the on-site walkthrough itself, and the written report you deliver afterward. Training bodies within the industry generally recommend getting that report back to the client within a day or two, while the meeting itself is still fresh in their minds.
Here’s the compact version you can screenshot before your next appointment.
Before you arrive:
- Confirm the address, entry time, and whether the agent or homeowner will be present.
- Review listing photos, floorplans, and any agent notes on the property’s history.
- Pack your intake form, a camera or smartphone, a measuring tape, and any mood references.
During the walkthrough:
- Start at the curb, then follow the buyer’s likely path through the front door.
- Move room by room, labelling each fix as A (non-negotiable), B (high impact), or C (optional).
- Take standardised photos and measurements in every room, not just the ones that need obvious work.
After you leave:
- Send the written report within 24 to 48 hours while the client’s interest is still high.
- Present a clear quote with at least two pricing options, not a single take-it-or-leave-it figure.
- Follow up with an email that includes action items and an option to book the next step.
The consultations that convert are the ones where the client can see, in writing, exactly what happens next and what it costs. Ambiguity is what kills momentum, not price.
Key Takeaways
A staging consultation succeeds when it produces a prioritised scope, a clear price, and a booked next step, all delivered within 24 to 48 hours of the visit.
| Point | Details |
|---|---|
| Prepare before you arrive | Collect intake details and review listing photos so the walkthrough confirms rather than discovers issues. |
| Open with a script | State purpose, duration, deliverables, and decision process in the first five minutes to set client expectations. |
| Walk curb first, then rooms | Assess the exterior and buyer path before moving room by room using A/B/C priority labels. |
| Deliver the report fast | Send a written report with annotated photos and priced options within 24 to 48 hours to keep momentum. |
| Pair recommendations with rental support | Where furniture is needed, not just rearranging, Expats Partner’s rental packages and staging services close the gap between quote and install quickly. |
Table of Contents
- Before the meeting: client intake, scheduling and research
- How should you open the consultation and question the client?
- What should the room-by-room walkthrough cover?
- What should the written report contain, and how fast should it arrive?
- How much should you charge for a staging consultation?
- What tools and templates make consultations run smoothly?
- How do you follow up without letting scope creep in?
- How much time should you budget for a consultation?
- What actually wins clients during the consult itself
- How Expats Partner supports your consultation outcomes
- Internal templates and pages worth using during consults
- FAQ
Before the meeting: client intake, scheduling and research
The consultation itself is only as good as the homework you do beforehand. A rushed arrival, where you’re still asking basic questions the agent could have answered by email, signals disorganisation before you’ve even opened your notebook.
Send an intake form ahead of the visit and ask for these fields at minimum:
- List date goal: when does the client want the property on the market?
- Buyer profile: who is the target buyer, if the agent has one in mind?
- Current marketing status: is the listing already live, or is staging happening pre-launch?
- Occupants and pets: this affects both your walkthrough and your recommendations.
- Known repairs or issues: anything the client already knows needs attention.
- Budget guidance: even a rough range helps you calibrate your recommendations before you walk in.
Before you leave for the appointment, pull up the listing photos or floorplan if one exists. Note the things you can already see from photos alone: awkward lighting, rooms with no furniture at all, or a front entrance that looks cluttered even in a professionally shot image. Arriving with these observations already in mind means you spend your time on-site confirming and refining, not discovering from scratch.
Logistics matter more than most newcomers expect. Confirm parking, building access, and whether the agent will be present, because a condo consultation with a security desk and lift booking system runs very differently to a landed house you can simply drive up to. Timebox the visit in your own head before you arrive, and bring a measuring tape, camera, your intake form, and one or two mood references if the client has mentioned a style preference.
Pro Tip: Frame your pre-consult message around collaboration, not inspection. A line like “I’ll be looking at the property the way a buyer would, and we’ll work through my notes together” lands far better than silence followed by a list of everything wrong with the living room.
How should you open the consultation and question the client?
The first five to ten minutes set the tone for everything that follows. Open with a short script that covers four things: why you’re there, how long the meeting will take, what the client will receive afterwards, and how the decision process works. Something close to this works well:
“I’m going to walk through the property today looking at it the way a buyer would. This should take about an hour. Afterwards, I’ll send you a written report within a day or two with photos, priorities, and pricing options, so you can decide what makes sense for your timeline.”
That single paragraph removes most of the anxiety a homeowner feels walking into a staging consult, because they now know what to expect and when.
Once the frame is set, the questions differ depending on who’s in the room.
Questions for homeowners:
- What’s driving the timeline, a job move, a growing family, downsizing?
- Are there any items in the home with sentimental value you’d want kept visible?
- What’s your comfort level with rearranging or removing furniture?
- Do you have a rough budget in mind for staging or improvements?
- Is anyone still living in the property during the staging period?
Questions for agents:
- Who’s the target buyer for this specific unit?
- What are the closest comparable listings doing, in terms of presentation and price?
- When does marketing start, and is there a scheduled photo day?
- Are there any known objections from previous viewings, if this is a relisting?
Keep introductions and this Q&A to roughly five to ten minutes. Going longer eats into walkthrough time, and clients tend to remember the visual recommendations more than the conversation anyway.
This is also the moment to surface veto items gently. If a homeowner mentions early on that grandma’s dining table isn’t going anywhere, note it and move on rather than debating it. Budget conversations work best framed around outcomes: “For a place this size, most sellers spend somewhere in this range on staging, and here’s roughly what that buys” rather than opening with a bare number.
What should the room-by-room walkthrough cover?
Practitioners in the staging industry consistently recommend starting outside, not inside. A buyer’s first impression forms at the curb, so that’s where your assessment should too. Walk the approach the way a viewer would, noting sightlines, entry clutter, and anything that undercuts the first thirty seconds of a viewing.

From there, move through the home in the order a buyer naturally would, rather than jumping between rooms. Use a consistent priority system so your notes translate cleanly into the written report later: A for non-negotiable issues that affect saleability or safety, B for high-impact aesthetic or layout changes, and C for optional styling touches.
| Room | What to check | Typical priority |
|---|---|---|
| Curb and entry | Sightlines, clutter, door hardware, lighting | A/B |
| Living room | Furniture scale, traffic flow, focal point | A/B |
| Dining area | Table proportion to room, seating clarity | B |
| Kitchen | Counter clutter, cabinet fronts, lighting | A/B |
| Primary bedroom | Bed placement, storage visibility, natural light | B |
| Secondary bedrooms | Furniture scale, defined purpose per room | B/C |
| Bathrooms | Fixtures, storage, small styling details | C |
| Balcony/outdoor space | Usability, furniture condition, plants | C |
| Storage areas | Visible capacity, clutter level | B |
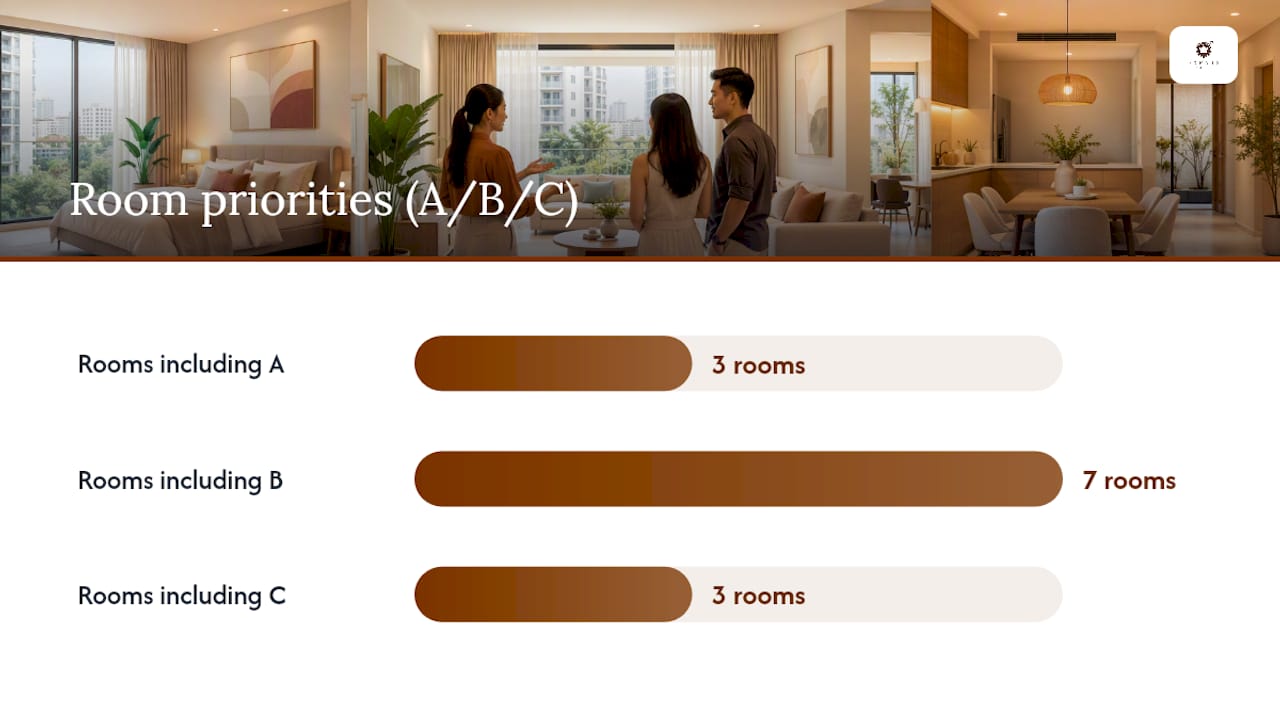
For photos, take at least three shots per room from fixed points, an entry angle, a shot across the room, and a corner-to-corner view, so future comparisons and quotes are consistent. Name files by address, room, and angle. It sounds like a small habit, but standardising this early means that if a consult later turns into a full vacant staging project, you’re not hunting through a messy camera roll to find the right reference shot. Take basic measurements of each room’s key walls at the same time, since you’ll need them if the project moves to furniture selection.
What should the written report contain, and how fast should it arrive?
The written report is where the consultation earns its fee. Practitioners in the staging field are consistent on one point: recommendations need to be specific and actionable, not vague directives like “declutter the living room.” Tell the client exactly what to move, what to remove, and what to bring in.
A workable report structure runs like this:
- Front page: a short curb-appeal note with an annotated photo, since that’s the first thing a buyer sees and it sets the tone for the rest of the document.
- Room-by-room summary: your A/B/C priorities from the walkthrough, each with a caption explaining the reasoning.
- Photos with captions: not just “before” shots, but photos marked up to show what changes are being suggested.
- Recommended tasks with a rough cost band: enough detail that the client understands scale without needing a full itemised invoice yet.
- Staged scope options: typically two or three tiers, from minor touch-ups through to a full furnished install.
- Timeline: how long each option would realistically take from approval to completion.
On pricing, present the trade-offs plainly. A “quick fixes” option might cover decluttering and rearranging existing furniture. A “partial staging” option might bring in key pieces for the living and primary bedroom only. A “full install” option furnishes the entire property. Laying these out side by side lets the client self-select based on budget and timeline rather than feeling pressured into the most expensive tier.
Turnaround matters more than most stagers appreciate. Momentum from the consultation fades within days, so a report delivered inside 24 to 48 hours captures a decision while the client is still mentally invested. If you know your report will take longer, say so at the sit-down rather than letting the delay come as a surprise. For homeowners weighing whether staging is worth the outlay at all, our page on how home staging can boost property value is a useful reference to share alongside the report.
How much should you charge for a staging consultation?
Charging models vary widely across the industry, and there’s no single correct answer. Some staging businesses treat the consultation as a client acquisition tool and offer a free short walk-through, hoping it converts into a paid installation. Others charge a fixed fee for a full, occupied-home consultation, often somewhere in the S$150 to S$400 range depending on the market and scope of the visit, then apply that fee as a credit against the installation cost if the client proceeds.
A tiered approach often works best for newcomers still building a client base:
- Quickie consult: a shorter, lighter-touch visit, sometimes done virtually, aimed at sellers who mainly want quick, high-impact advice.
- Full consult: the complete sit-down, walkthrough, and written report process described above.
- Consult with credit: full fee charged upfront, refunded or credited against the installation if the client books within a set window.
Whichever model you choose, capture it in a short engagement agreement before the visit. At minimum, this should cover:
- The scope of what’s included (walkthrough, report, follow-up call)
- What’s explicitly excluded (installation, furniture sourcing, styling labour)
- Payment terms and whether a deposit is required for any installation work
- Cancellation and access rules, particularly for occupied properties
Frame the fee around value, not effort. Clients respond better to “this fee covers a full written assessment that typically shapes how buyers respond to the listing” than to a bare invoice line that just says “consultation.”
What tools and templates make consultations run smoothly?
A consistent kit saves you from scrambling at the door and makes every consultation feel the same to run, even as your client list grows.
Physical kit:
- Smartphone or camera with adequate storage cleared in advance
- Measuring tape and a small notepad or tablet for notes
- Fabric or paint swatches if you offer styling guidance
- Portable lighting for darker rooms, useful for photos as much as assessment
- A printed or digital copy of your engagement agreement
Templates worth building once and reusing every time:
- An intake form covering the fields listed earlier in this guide
- A room checklist spreadsheet matching the A/B/C structure from the walkthrough section
- A photo naming convention (address_room_angle) applied consistently across every job
- A written report template in Word or PowerPoint, with placeholder sections for curb notes, room priorities, and pricing tiers
Pro Tip: Standardise your photo angles and filenames from your very first consultation, not once you’ve got a backlog to fix. It costs nothing extra in the moment, and it means that if a consult later turns into a full vacant install, your quoting team isn’t reconstructing context from scratch.
When a consultation reveals that a property genuinely needs furniture, not just rearranging, renting staged pieces through Expats Partner shortens the gap between quote approval and install day, and avoids the upfront cost of buying furniture that only needs to look good for a few weeks of viewings.

How do you follow up without letting scope creep in?
The follow-up email does two jobs: it locks in the decisions made during the meeting, and it prevents the kind of open-ended “can you also just look at…” requests that erode your margin on a fixed-fee job.
A solid follow-up email includes:
- A one-paragraph summary of what was discussed and agreed
- The decisions made on the spot, if any (for example, the client confirming they want the full install option)
- Itemised next steps, each with an owner and a rough deadline
- The written report and photos attached, not linked separately where possible
The A/B/C labelling system from the walkthrough earns its keep again here. Use it consistently in both the report and the quote: essential items are must-do fixes, recommended items carry high impact but aren’t dealbreakers, and optional items are pure styling or finish touches. Clients triage far faster when they can see which category a task falls into, rather than reading a flat list and wondering what actually matters.
Before you leave the follow-up conversation, try to schedule the next concrete step, whether that’s an installation date or a follow-up pricing call. Reserving a provisional install window, even a rough one, raises conversion because the client sees an immediate path to a finished home rather than an open-ended maybe. Momentum fades fast once a report lands in someone’s inbox with no clear next action attached.
How much time should you budget for a consultation?
Time budgeting protects both your profitability and the client’s expectations. Underestimate the walkthrough and you’ll either rush the assessment or run late for your next appointment.
| Stage | Typical time |
|---|---|
| Pre-consult review (listing, photos, intake form) | 15 minutes |
| Sit-down and questions | 5–10 minutes |
| Room-by-room walkthrough | 45–90 minutes, depending on size |
| Report preparation | 30–90 minutes |
For recurring client types, a shorter 10-minute prep checklist is usually enough once you’ve built familiarity with the format. First-time consultations, or anything unusually high-stakes such as a large landed property or a multi-unit development, deserve closer to 20 to 30 minutes of prep so you’re not caught off guard by scale or complexity.
Ask for the intended list date as early as possible, ideally during the initial intake, since that date determines how far in advance you should recommend booking any staging installation or rental furniture. Properties listing within two to three weeks need faster decisions and tighter install scheduling than those with a more flexible timeline.
What actually wins clients during the consult itself
The stagers who convert consistently aren’t necessarily the most talented decorators in the room. They’re the ones who make the process feel predictable from the first minute.
Opening with the same short script every time, purpose, duration, deliverables, decision process, does something subtle: it tells the client you’ve done this before and know exactly how it unfolds. Clients relax when they can see the shape of the meeting ahead of them, and a relaxed client asks better questions and reveals more useful information during the walkthrough.
One habit worth adopting: bring a rough visual reference of the finished look before you leave the sit-down, even a simple mood board or a photo of a similarly staged room. It gives the client something concrete to hold onto mentally while you’re pointing out flaws in their current living room, which softens what could otherwise feel like criticism.
During the follow-up call, offer two clearly priced options rather than one, and mention that installation slots are limited in any given week. This isn’t a pressure tactic so much as an honest operational fact, staging teams and rental inventory genuinely do get booked, and naming that reality gives the client a real reason to decide promptly rather than let the report sit unread for a fortnight.
Listen for the client’s own words about their timeline and goals during the sit-down, then echo those exact words back when you close the follow-up call. If a homeowner said early on that they wanted “to be moved out by the school holidays,” repeating that phrase back when proposing an install date does more to secure a deposit than any generic urgency line ever will.
How Expats Partner supports your consultation outcomes
Once a consultation identifies that a property needs furniture, not just rearranging, the practical question becomes how fast you can turn that recommendation into a viewing-ready room. Expats Partner is built around exactly that gap: real rental inventory, transparent pricing, and delivery and setup handled without the client needing to buy anything they’ll only use for a few weeks.
Common pairings we see work well after a consultation include a short-term rental package booked alongside a photo day, a full furnished install for a vacant unit heading to market, or a lighter rental package to cover just the rooms flagged as priority A or B in your report. If your consult flagged a vacant condo or landed property needing a full furnished look, our home staging services page outlines packages and typical install logistics, and our short-term furniture rental options are worth checking for photo-day or listing-period needs specifically.
Booking lead times matter, especially close to a listing date, so get in touch early once your report has gone out and the client has chosen a direction. A quick enquiry through our contact page is enough to check inventory availability and lock in a delivery window before your client’s momentum has a chance to fade.
Internal templates and pages worth using during consults
A few Expats Partner resources are worth keeping bookmarked alongside your own templates, since they cover moments a generic checklist can’t.
- Our staging checklist for open house success gives a room-by-room reference you can adapt into your own pre-consult review.
- When a client questions the fee or the value of staging at all, how to explain staging value to clients effectively offers language that reframes the conversation around outcomes rather than cost.
- Sharing a home staging results example during or after the sit-down gives hesitant clients visual proof rather than just your word.
- For vacant units flagged during the walkthrough, the vacant apartment staging checklist covers considerations that occupied-home checklists miss entirely.
- If the consult involves a high-rise unit, condo staging for property agents addresses layout and space constraints specific to that property type.
Each of these fits a different moment in the consultation process, pre-visit prep, mid-conversation persuasion, or post-report follow-up, rather than duplicating what’s already in your own report template.
FAQ
How long should a home staging consultation take?
Most full, occupied-home consultations run 45 to 90 minutes for the walkthrough itself, plus 5 to 10 minutes for the opening sit-down, depending on property size and how many rooms need discussion.
How soon should I send the written report after the consult?
Send it within 24 to 48 hours. Momentum from the visit fades quickly, and a fast turnaround keeps the client’s decision-making energy focused on your recommendations rather than a competing priority.
What should I charge for a staging consultation?
Charging models vary: some stagers offer a free short walk-through as a client acquisition tool, while others charge a fixed fee, often in the S$150 to S$400 range, for a full consultation with a written report.
What’s the difference between essential, recommended, and optional in a staging report?
Essential items are non-negotiable fixes that affect saleability, recommended items carry high aesthetic or layout impact without being dealbreakers, and optional items are pure styling or finishing touches.
Can Expats Partner supply furniture identified during a staging consult?
Yes. Where a consultation shows a property needs furniture rather than rearranging, Expats Partner’s short-term and long-term rental packages and staging services can be booked to match the report’s recommended scope and timeline.