
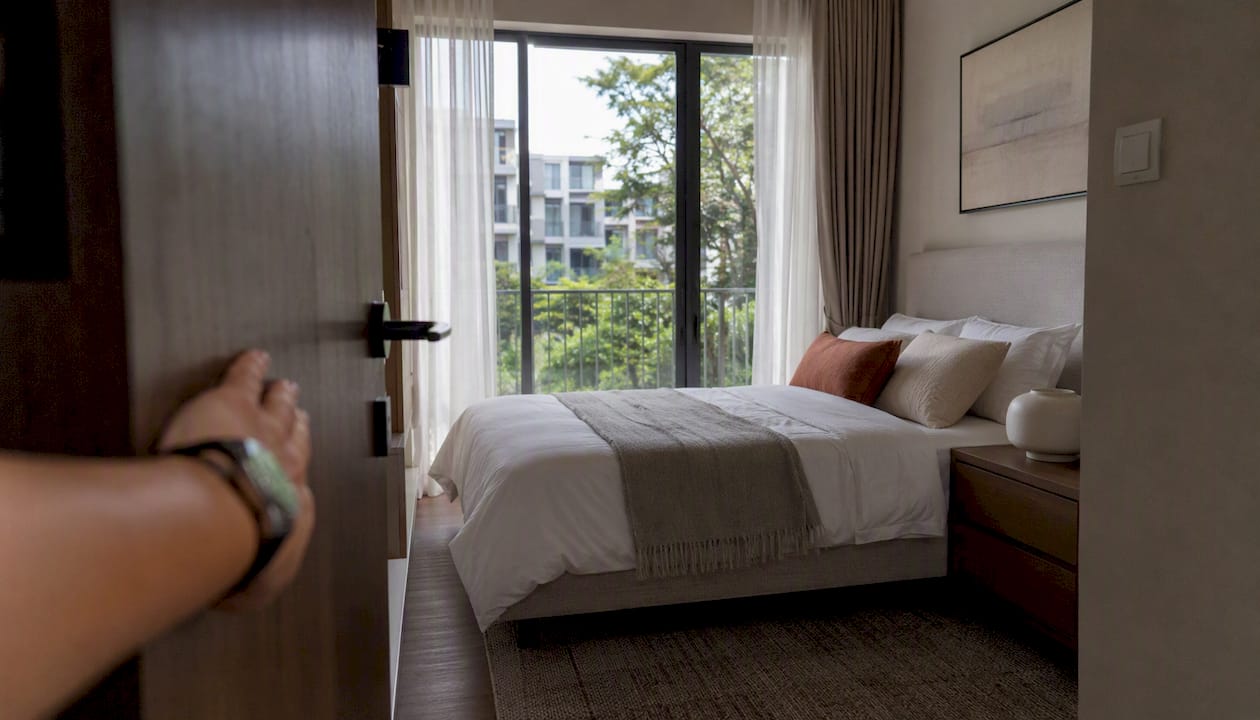
Before a buyer sets foot inside, your home should be clean, repaired, decluttered, and ready to show every included item and completed fix. During the walkthrough itself, guide the buyer calmly through each room, have your repair receipts and documentation to hand, and let the space speak without hovering.
Day-of priorities at a glance:
- Deep-clean every room, including skirting boards, windows, and appliances
- Confirm all agreed repairs are finished and documented
- Remove personal items, excess furniture, and anything not included in the sale
- Test every light switch, tap, appliance, and door handle before the buyer arrives
- Set the temperature and scent to neutral
- Prepare a folder of receipts, contractor invoices, and timestamped photos
- Be present but not intrusive; answer questions directly and honestly
Buyers form first impressions within seconds. Experienced stagers note that a pre-listing walkthrough catches the small, cumulative maintenance issues that sellers stop noticing but buyers spot immediately. Getting the fundamentals right before styling is what separates a confident, viewing-ready home from one that raises doubts.
Key takeaways
Staging a home for a buyer walkthrough works best when the five fundamentals — declutter, depersonalise, deep-clean, repair, and maximise light — are completed before any styling or photography begins.
| Point | Details |
|---|---|
| Complete fundamentals first | Declutter, depersonalise, deep-clean, repair, and maximise light before styling or photography. |
| Room-by-room preparation | Each space needs a specific sweep; kitchens, bathrooms, and entrances carry the highest buyer scrutiny. |
| Documentation prevents disputes | Keep contractor receipts, timestamped repair photos, and a copy of the sale agreement ready at the walkthrough. |
| Staging for photos needs full-room shots | Wide, well-lit compositions show layout and flow; styled vignettes alone are not enough for listing images. |
| Expats Partner for full-service staging | Expats Partner provides furniture rental, styling, and staging packages for Singapore condos, landed homes, and resale units. |
Table of Contents
- What staging fundamentals should you complete first?
- Room-by-room staging checklist for every space
- How do you stage specifically for listing photos and virtual tours?
- What do buyers actually check during an in-person walkthrough?
- How much does staging cost, and when should you hire a professional?
- What staging mistakes undermine a buyer walkthrough?
- Your day-of walkthrough checklist
- Staging through a buyer’s eyes: what sellers often miss
- Useful sources and further reading
- Staging support for your Singapore property sale
- FAQ
What staging fundamentals should you complete first?
Effective staging follows a clear sequence: prepare the property, then style it, then photograph it. Skipping straight to styling wastes effort, because no arrangement of cushions fixes a scuffed wall or a dripping tap in a buyer’s mind.
The five fundamentals, drawn from established staging practice, are:
- Declutter. Remove everything that does not serve the room’s purpose. Clear kitchen benchtops, empty half the wardrobe, and box up anything stored on the floor. Buyers need to see storage capacity, not your belongings filling it.
- Depersonalise. Take down family photographs, personal collections, and anything that anchors the home to your identity. The goal is for a buyer to picture their own life there, not yours. Keep enough warmth so the space does not feel clinical.
- Deep-clean. Clean beyond your usual standard. Grout lines, oven interiors, extractor fans, window tracks, and skirting boards all register with buyers even when they cannot articulate why.
- Repair. Fix every minor defect before styling. Loose hinges, cracked tiles, stained ceilings, and dripping taps are cheap to address but expensive in buyer confidence. A buyer who spots three small faults starts wondering what else has been left.
- Maximise light and space. Replace dim bulbs, clean windows inside and out, and remove heavy curtains where possible. In Singapore’s condo market, where units can feel compact, every lux of natural light counts.
Only once these five steps are complete does styling add real value. A staged listing built on clean, repaired, decluttered rooms photographs better, shows better, and gives buyers fewer reasons to negotiate.
Pro Tip: The highest-return, lowest-cost fix is usually a single tin of neutral paint on the most-used wall in the living room or hallway. Combined with new door handles throughout, it refreshes the whole property for a fraction of what buyers will mentally deduct if they see wear.
Room-by-room staging checklist for every space
Work through each room in the order below. Each entry starts with a priority level and the single most important action for that space.
Outside and kerb appeal (Priority: High)
The first impression happens before the front door opens.
- Clear the entrance path, letterbox area, and any shared lobby space
- Wipe down the front door, replace a worn door mat, and check the doorbell works
- Remove bicycles, shoes, and storage items from the entrance
- For landed homes, mow the lawn, trim hedges, and pressure-wash the driveway
- For condos, tidy the unit door area and any personal items in the corridor
Camera tip: Photograph the entrance from the path, not the doorstep. Show the approach, not just the door. For landed property staging, capture the full frontage in the morning before harsh midday shadows appear.
Hallway and entrance (Priority: High)
- Remove all shoes, bags, and coats from sight
- Add one simple item: a small plant, a mirror, or a single piece of wall art
- Ensure the hallway light works and is bright
Camera tip: Shoot from the front door looking in to show depth and flow.
Living room (Priority: High)
- Remove excess furniture; leave only what defines the seating arrangement clearly
- Clear all surfaces except one or two deliberate accessories
- Fluff cushions, straighten rugs, and check the sofa for stains
- Open blinds fully and turn on all lights for viewings
Camera tip: Shoot from the corner of the room to capture the full space. Avoid shooting toward a window, which blows out the exposure.
Practical note for occupied homes: Keep a storage box in a cupboard for the items you clear each morning before a viewing. A 15-minute sweep becomes routine within a week.
Dining room (Priority: Medium)
- Set the table simply: placemats, a small centrepiece, nothing elaborate
- Remove extra chairs if they crowd the space
- Check the light fitting is clean and the bulbs match in colour temperature
Camera tip: Shoot from the entrance to the dining area so the table reads as a destination, not an obstacle.
Kitchen (Priority: High)
- Clear every benchtop except one appliance (a kettle or coffee machine reads as lived-in without clutter)
- Clean the hob, oven, extractor fan, and sink thoroughly
- Check all appliances included in the sale are present and working
- Empty and wipe the inside of the fridge if it is included
Camera tip: Shoot from the doorway to show the full run of cabinetry. Buyers want to see storage, not just the island.
Bedrooms (Priority: High for master, Medium for others)
- Make all beds with fresh, neutral linen
- Clear bedside tables to one item each
- Remove personal items from dressing tables and wardrobes; leave wardrobes slightly open to show space
- Check curtains or blinds open fully
Camera tip: Shoot from the doorway with the bed as the focal point. Avoid shooting from the bed toward the door, which makes the room look smaller.
Bathrooms (Priority: High)
- Remove all personal toiletries, razors, and products from surfaces and shower ledges
- Replace with one or two clean, matching towels and a small plant or candle
- Clean grout, mirrors, and taps until they shine
- Check the toilet seat, flush, and all taps for leaks or stiffness
Camera tip: Shoot from the doorway. A clean, minimal bathroom photographs well even when small.
Study or home office (Priority: Medium)
- Clear the desk to a single monitor or lamp
- Tidy cables and remove personal paperwork
- Show the room as a usable workspace, not a storage overflow
Garden, balcony, or outdoor space (Priority: Medium to High depending on size)
- Remove dead plants, clear clutter, and wipe down outdoor furniture
- Add one or two potted plants if the space is bare
- For condos, ensure the balcony is clear and the sliding door opens smoothly
Camera tip: Photograph outdoor spaces in the early morning or late afternoon for the best light. Show the full space, not just one corner.
For a full checklist tailored to vacant units, the vacant apartment staging checklist covers each room in detail.
How do you stage specifically for listing photos and virtual tours?
Staging for photographs is not the same as staging for an in-person visit. A room that feels pleasant in person can look flat or cluttered on camera. The reverse is also true: a carefully composed shot can make a small room look generous.
The core principle is full-room composition. Listing photos should show the whole room, not just a styled corner. Buyers use photos to understand layout and flow before they book a viewing, so every room needs at least one wide shot that accurately reflects what they will find on arrival.
Photography checklist:
- Shoot in the morning when natural light is softest and most even
- Turn on every light in the room, including lamps, to warm the image
- Remove small personal items from surfaces immediately before shooting (phone chargers, keys, water bottles)
- Tidy cables behind TVs and desks
- Open all doors to show flow between rooms
- Use a wide-angle lens or your phone’s 0.5x setting, but avoid extreme distortion
- Shoot from corner to corner at roughly chest height, not from the floor or ceiling
Virtual walkthrough tips:
- Plan the tour route before recording: entrance, living room, dining, kitchen, bedrooms, bathrooms, outdoor
- Keep all internal doors open so the camera moves through the home without interruption
- Speak to continuity: the staging in each room should feel consistent in colour palette and style
- Record in landscape orientation and in good light; avoid shooting into windows
Pro Tip: For phone photography, use the native camera’s portrait or photo mode rather than a third-party app. Clean the lens first. Then edit only brightness and contrast in the phone’s built-in editor. Over-edited photos create a mismatch between the listing and the actual walkthrough, which erodes buyer trust.
For more on capturing room flow effectively, the guide on staging a property listing covers composition and lighting in practical detail.
What do buyers actually check during an in-person walkthrough?
Buyers at a walkthrough are not admiring the décor. They are verifying that the home matches what was agreed and that no new problems have appeared since they last visited.
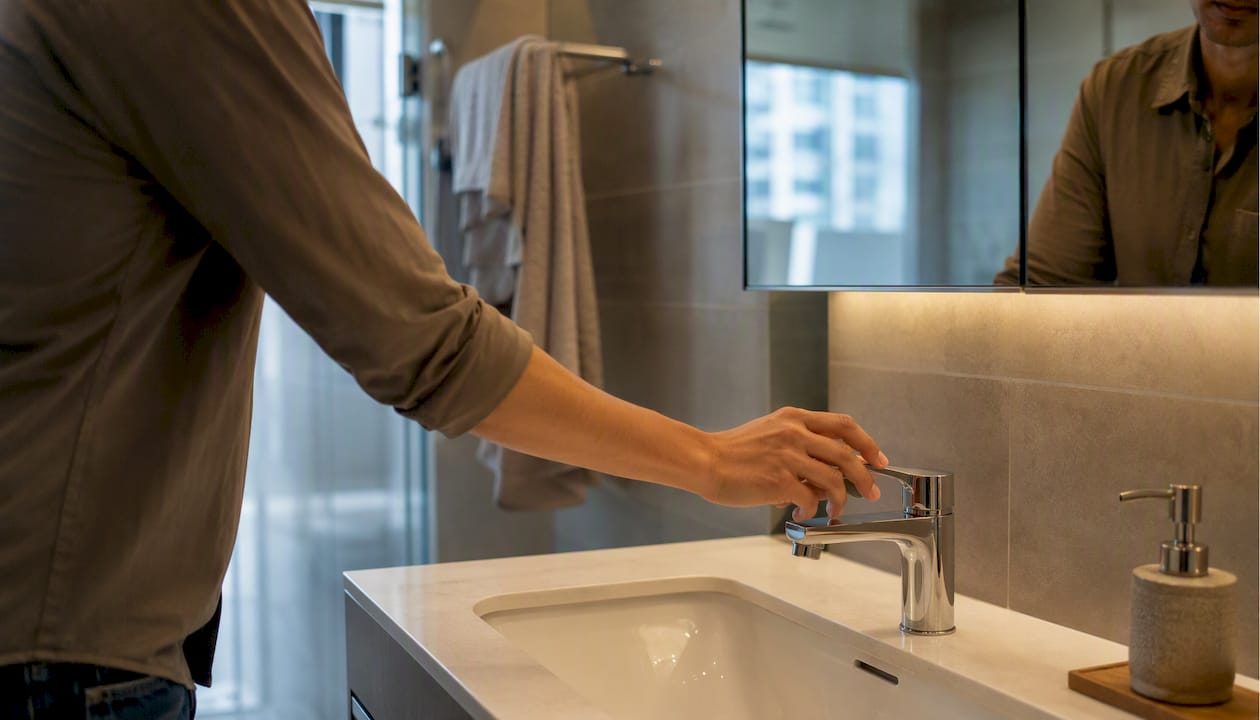
The three priorities buyers focus on are: agreed repairs are complete, all systems and appliances work, and every included item is still present. If any of these three are in doubt, the buyer can request fixes, credits, or a delay to closing.
| Buyer check | What they look for | What you should have ready |
|---|---|---|
| Agreed repairs | Visible completion of all items listed in the contract | Contractor receipts, timestamped photos |
| Appliances | All included appliances present and operational | Test each one before the buyer arrives |
| Fixtures and fittings | Light fittings, taps, handles, and blinds all working | Walk through and test the day before |
| Cleanliness | No new stains, marks, or damage since last visit | Deep-clean completed promptly |
| Included items | Furniture, curtains, or fittings listed in the sale remain | Cross-check against the sale agreement |
| No new damage | Walls, floors, and ceilings in the same condition | Document with photos before the buyer arrives |
Evidence to have on hand:
- Contractor invoices with dates and descriptions of work
- Timestamped photographs of completed repairs
- Signed confirmation from your agent of what is included in the sale
- Appliance manuals and warranty cards for included items
- A copy of the sale agreement showing agreed inclusions
Pro Tip: Organise your repair documentation in a single folder, physical or digital, and offer to share it at the start of the walkthrough. Buyers who see evidence upfront spend less time scrutinising and more time confirming. It signals confidence, not defensiveness.
How much does staging cost, and when should you hire a professional?
The honest answer is that staging costs vary widely, and the right level of investment depends on the property’s condition, price bracket, and target buyer. Most sellers can achieve a meaningful result with a combination of DIY preparation and selective professional help.
Cost bands to consider:
- Low-cost DIY (under S$500): Decluttering, deep-cleaning, repainting one or two walls, replacing door handles and light bulbs, adding fresh linen and a few plants. This level suits well-maintained properties where the fundamentals are already strong.
- Mid-range partial staging (S$500–S$2,000): Hiring a cleaner, renting a few key furniture pieces or accessories for vacant rooms, and engaging a photographer. Suitable for properties that need a visual lift without a full overhaul.
- Full-service professional staging: Covers furniture rental, styling, photography, and sometimes virtual tour production. Best suited to higher-value properties, vacant units, and homes where the seller wants to maximise speed of sale.
When to hire a professional stager:
- The property is vacant and needs furniture to show scale and purpose
- The home is in a competitive price bracket where presentation directly affects offers
- You are selling remotely or do not have time to manage preparation yourself
- Previous viewings have not converted to offers despite reasonable interest
When choosing a staging package, check that it includes furniture delivery and collection, that the inventory is real and photographable, and that pricing is transparent before you commit.
For sellers who want to understand the return on staging investment before deciding, the guide on why staging pays off sets out the case clearly.
What staging mistakes undermine a buyer walkthrough?
The most common staging errors are overpersonalising, concealing defects, and poor lighting. Each one creates doubt in a buyer’s mind, and doubt leads to lower offers or no offer at all.
Red flags and quick fixes:
- Too many personal items. Family photos, religious objects, and personal collections make it harder for buyers to picture themselves in the space. Remove them before every viewing, not just the first.
- Hiding defects rather than fixing them. A rug placed over a damaged floor, or furniture pushed against a damp wall, will be noticed. Buyers check behind and underneath. Fix the defect or disclose it; concealment creates legal risk and destroys trust.
- Poor or mismatched lighting. Dark rooms feel smaller and less cared-for. Replace every dead or dim bulb before viewings begin. Mismatched colour temperatures (some warm, some cool) make a room look unfinished.
- Overpowering scent. Strong air fresheners or candles signal that something is being masked. Neutral is better: ventilate the home for at least 30 minutes before a viewing.
- Cluttered storage areas. Buyers open wardrobes, kitchen cupboards, and utility rooms. Overstuffed storage suggests the home lacks space. Half-empty cupboards read as generous.
- Staging that does not match the listing photos. If the photos show a styled dining table and the buyer arrives to find it bare, the mismatch creates unease. Keep the staging consistent between photography and viewings.
A note on what not to promise: Do not include verbal commitments about upgrades, inclusions, or repairs that are not written into the sale agreement. Uncontracted promises create disputes at the walkthrough and can delay or derail closing.
Your day-of walkthrough checklist
Use this checklist on the morning of every viewing or final walkthrough. It covers the full sweep from first light to buyer arrival.
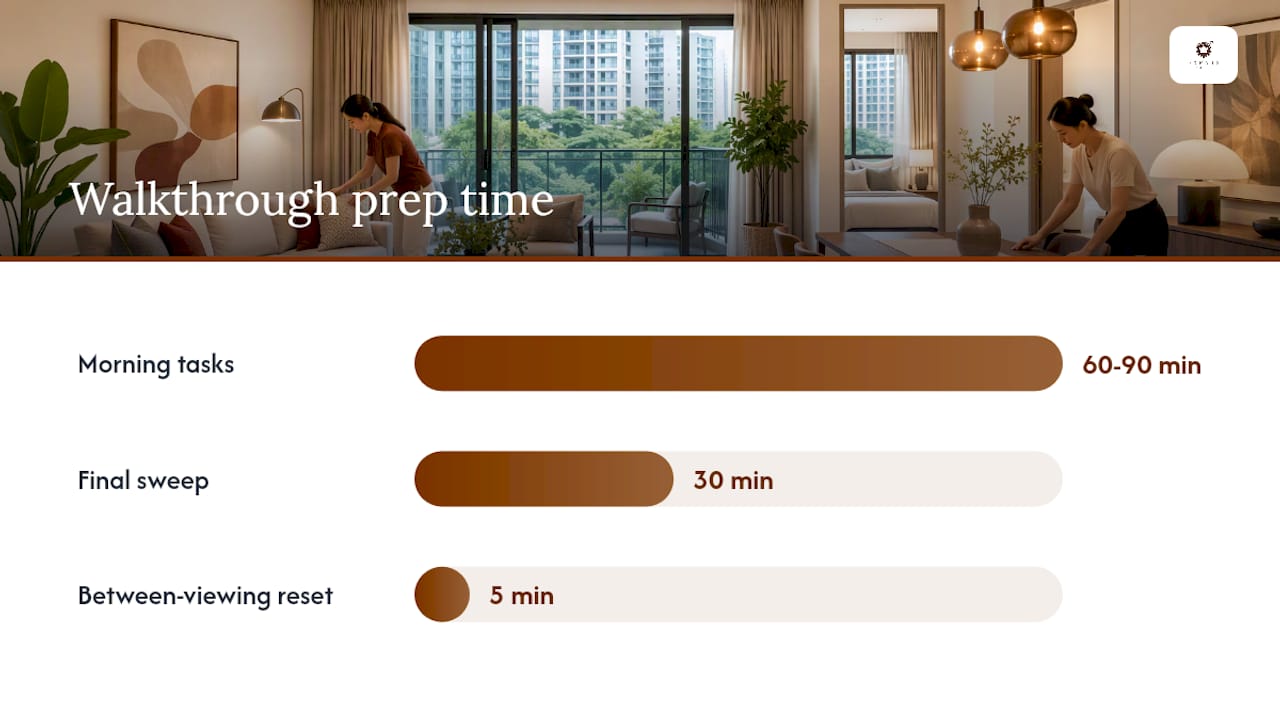
Morning tasks (60–90 minutes before):
- [ ] Open all windows to ventilate; close 20 minutes before arrival
- [ ] Make all beds with fresh linen
- [ ] Clear all surfaces in kitchen, bathrooms, and living areas
- [ ] Wipe down kitchen benchtops, hob, and sink
- [ ] Clean bathroom mirrors and taps
- [ ] Empty all visible bins
- [ ] Vacuum or sweep all floors
- [ ] Wipe skirting boards and door frames
- [ ] Check all light bulbs work; replace any that have failed
Final 30-minute sweep:
- [ ] Turn on all lights, including lamps
- [ ] Open all blinds and curtains fully
- [ ] Set the air conditioning to a comfortable temperature
- [ ] Place fresh towels in bathrooms
- [ ] Remove personal items from all surfaces
- [ ] Test every tap, flush, and appliance included in the sale
- [ ] Unlock all doors and cupboards the buyer may want to open
- [ ] Place your documentation folder (receipts, photos, agreement) on the kitchen counter
During the walkthrough:
- [ ] Greet the buyer at the entrance and offer a brief overview of the route
- [ ] Let the buyer lead the pace; do not rush them through rooms
- [ ] Answer questions directly; refer to your documentation folder for repair queries
- [ ] Point out any completed repairs and offer to show evidence
- [ ] Do not apologise for the home or draw attention to minor imperfections unprompted
- [ ] Stay available but give the buyer space to look independently
For multiple viewings in one day: After each viewing, do a five-minute reset: straighten cushions, wipe surfaces, and replace anything moved. Keep your documentation folder in the same place each time so you can find it quickly.
The open house staging checklist on the Expats Partner site covers additional preparation steps for high-traffic viewing days.
Staging through a buyer’s eyes: what sellers often miss
Sellers become blind to their own homes. It happens gradually and it is not a character flaw; it is simply what happens when you live somewhere long enough. The scuff on the hallway wall, the stiff kitchen drawer, the slight musty smell in the utility room — these stop registering. For a buyer walking in for the first time, they register immediately.
The gap between what a seller sees and what a buyer notices is where most staging effort should be directed. Small, cumulative maintenance details — a loose hinge, a cracked tile, or a light fitting with a dead bulb — do not individually sink a sale. Together, they create an impression of a home that has not been cared for, and that impression is hard to reverse once formed.
The practical fix is to walk through your own home as a stranger would. Start at the street. Look at the entrance path, the front door, the letterbox. Go inside and stand in the hallway for 30 seconds without moving. What do you smell? What do you see at eye level? What draws your attention? Then work room by room, opening every cupboard, testing every handle, and checking every surface at the height a buyer would naturally look.
This is not about perfection. Buyers understand that a lived-in home will show some wear. What they are assessing is whether the seller has been attentive. A home that has clearly been prepared with care signals that the less visible systems — plumbing, electrics, structure — have probably been looked after too. That confidence is worth more than any styling choice.
For sellers who want professional support with this process, Expats Partner’s home staging service in Singapore covers the full preparation sequence, from furniture rental to styling and photography, for condos, landed homes, and resale units.
Useful sources and further reading
- Rocket Mortgage final walkthrough checklist — covers what buyers verify at the walkthrough: completed repairs, working systems, and included items. Useful for sellers preparing their documentation folder.
- ReadySteadySell staging guide — outlines the five core staging fundamentals and the recommended sequence of prepare, stage, photograph.
- HGTV Ultimate Staging Guide Checklist — room-by-room preparatory tasks starting with planning, cleaning, and decluttering.
- Redfin final walkthrough guidance — explains what buyers can request if contract obligations are unmet at the walkthrough, and how unresolved items affect closing.
- The Advisory room-by-room staging guide — stresses full-room presentation and a consistent photographic approach for listing images.
For Singapore-specific staging support, visit the Expats Partner home staging page or browse the furniture rental options for staged properties and show flats.
Staging support for your Singapore property sale
Preparing a home for a buyer walkthrough takes time, attention, and the right furniture. Expats Partner provides home staging and furniture rental packages in Singapore specifically for sellers, landlords, and property agents who need a property to look its best quickly and without the cost of buying furniture outright.
Whether you are staging a vacant condo, a resale HDB flat, or a landed home, Expats Partner can supply real, photographable furniture on a short-term rental basis, with reliable delivery, setup, and collection included. Packages cover full-home staging or room-specific fills, with transparent pricing and no long-term commitment required.
If you are ready to get your property viewing-ready, explore the home staging packages or enquire about short-term furniture rental to find the right fit for your timeline and budget.
FAQ
What should a seller do the morning of a buyer walkthrough?
Complete a full clean, make all beds, clear every surface, test all appliances and taps, turn on all lights, and place your documentation folder where you can access it quickly. Allow 60–90 minutes for the full sweep.
What documents should a seller have ready at the walkthrough?
Bring contractor receipts for completed repairs, timestamped photographs of the finished work, a copy of the sale agreement showing included items, and appliance manuals for any items remaining with the property.
How much does home staging cost in Singapore?
DIY staging with cleaning, repainting, and minor fixes typically costs under S$500. Mid-range partial staging with furniture rental and professional photography sits in the S$500–S$2,000 range. Full-service staging for higher-value or vacant properties varies depending on the size of the unit and the scope of work.
What do buyers focus on during a final walkthrough?
Buyers primarily check that agreed repairs are complete, that all included appliances and fittings are present and working, and that the home’s condition matches what was agreed at the time of sale. Expats Partner’s staging preparation guides sellers through exactly these checkpoints.
When is it worth hiring a professional stager rather than doing it yourself?
Professional staging tends to pay off when the property is vacant, when it sits in a competitive price bracket, or when previous viewings have not converted to offers. A professional stager brings furniture, styling, and photography expertise that is difficult to replicate on a tight timeline.